1. Prepare your WooCommerce store for the import
Before we jump into the nitty-gritty, we need to make sure your WooCommerce and Shopify accounts are properly prepared for a safe product transfer. You’ll need:
- A Shopify store (obviously)
- A WooCommerce store (if you don't have one, set it up now using this handy guide)
Make sure to configure the following settings in your WooCommerce account before starting the import:
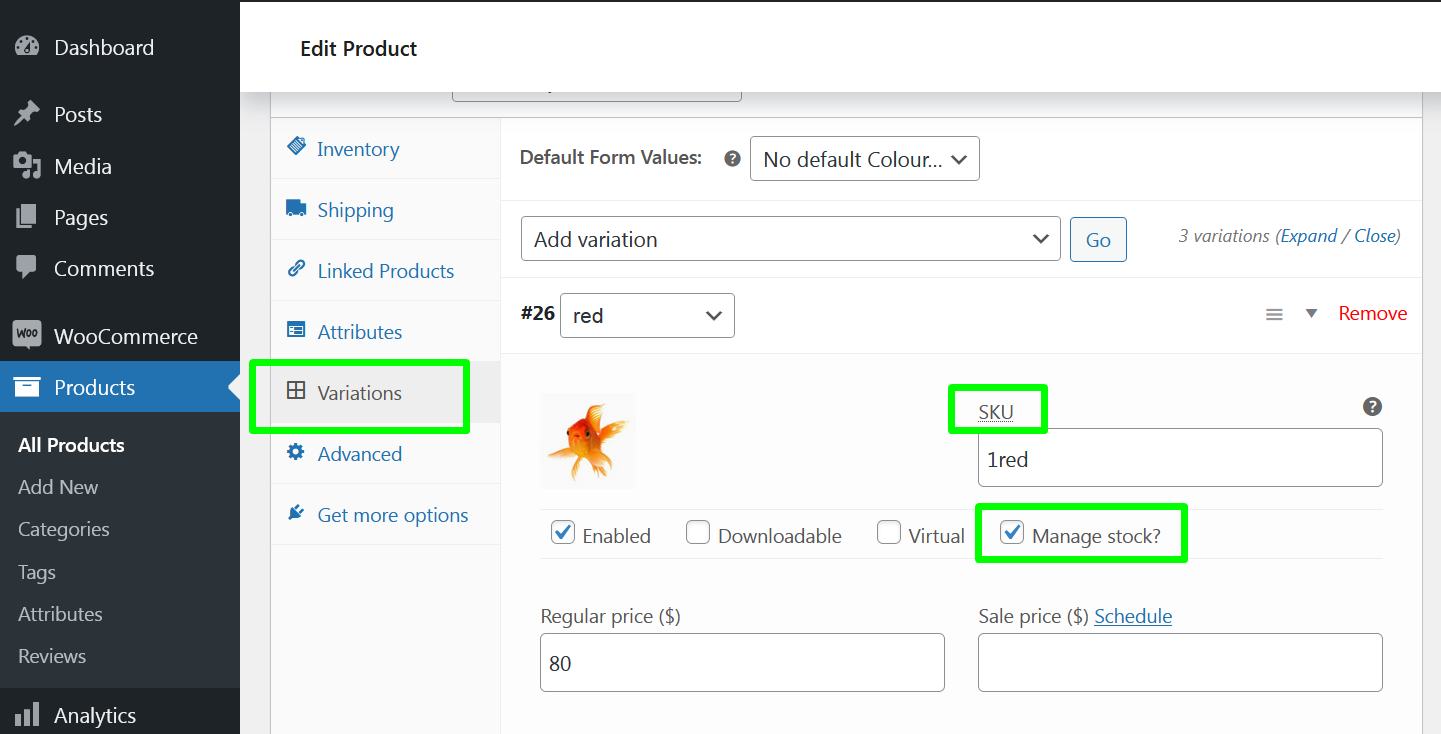
- Configure product settings: Make sure the “Product data” field in your WooCommerce account is set to "Variable product". This setting is the key that unlocks seamless syncing and compatibility between the two platforms.

- Configure variation settings: Once you've set your product data to "Variable product", click on the variations tab in the product data section and:
- Make sure each variation has a unique SKU. Pro tip: Keep it simple. Avoid special characters and stick to lowercase for easy management. Your future self will thank you when you're managing hundreds of SKUs!
- Tick the "Manage Stock?” checkbox for each variation. This little tick is crucial - it's what allows Syncio to sync stock levels for your products when they’re transferred over from Shopify.

2. Install Syncio on both stores
With Syncio, you can essentially create a universal language that both Shopify and WooCommerce understand, ensuring your products make the journey from one platform to another without getting lost in translation.
Syncio will safely import your Shopify products to your WooCommerce store in a matter of minutes — along with attributes like product titles, descriptions, images, vendors, variants, prices, and more.
Here's how:
- Install Syncio on your Shopify store: During set up, you’ll be asked to select your store type. Since you’re exporting products from Shopify to WooCommerce, select “Source Store” when installing Syncio on Shopify.
- Then, install Syncio on your WooCommerce store. When asked to select your store type for this store, select “Destination Store” (ie. the store you’re importing products to).
And that’s it! Now that you've installed Syncio on both stores, you can get them talking to each other.
3. Connect the stores with one click
We can now use Syncio to introduce your Shopify and WooCommerce stores to each other.
In the Syncio Dashboard of each store, you’ll see a ‘Unique store key’. To connect the two stores, simply copy and paste the Unique store key from one store to another. Here’s how:
- Enter the Syncio Dashboard for your Destination Store (i.e. your WooCommerce store) and copy the ‘Unique store key’

- Then enter the Syncio Dashboard for your Source Store (ie. your Shopify Store) and select the ‘Stores’ tab on the left
- Click ‘Connect new store’

- Select ‘Connect via store key’ and then paste the ‘Unique store key’ you copied over from your Destination Store.

Once connected, you’ll be able to access and import products from your Source Store (Shopify) to your Destination Store (WooCommerce) with one click.
4. Import products individually or in bulk
Alright, the moment of truth has arrived. It's time to start the import process and watch as your Shopify products magically appear in your WooCommerce admin.
With Syncio, you can choose to import individual or bulk products with one click. Simply:
- Enter the Syncio Dashboard for your Destination Store (ie. WooCommerce)
- Navigate to the ‘Products’ tab
- Click on the "Select a Source store" dropdown and select your Shopify store

At this stage, you can choose to either:
Import products in bulk
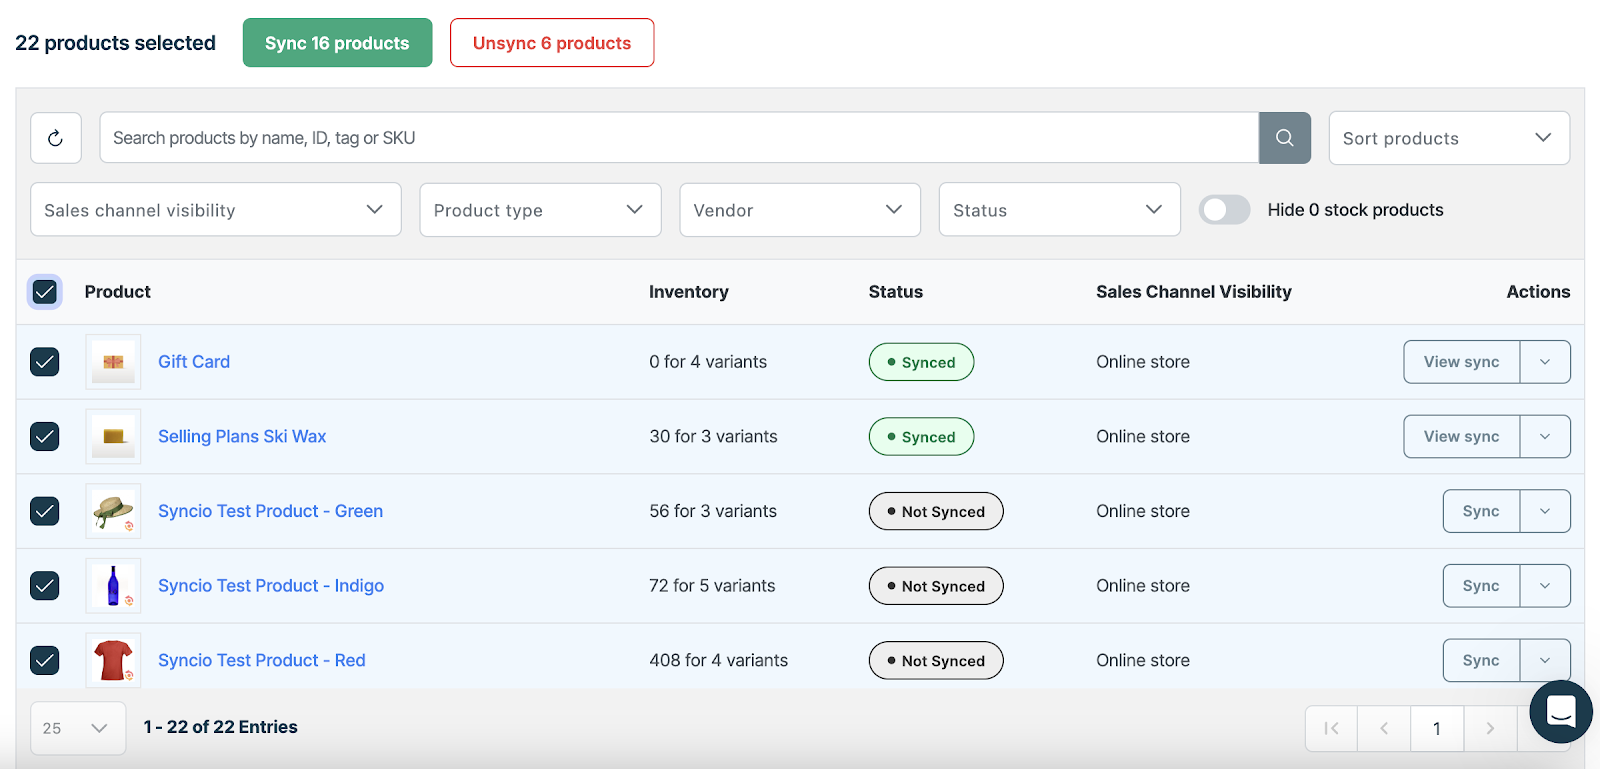
1. Use the checkbox function to select all products.
2. Bulk import them by clicking the "Sync" button on top.

3. Alternatively, use the filters to bulk select and import products based on attributes like name, tag, vendor etc.
Import products individually
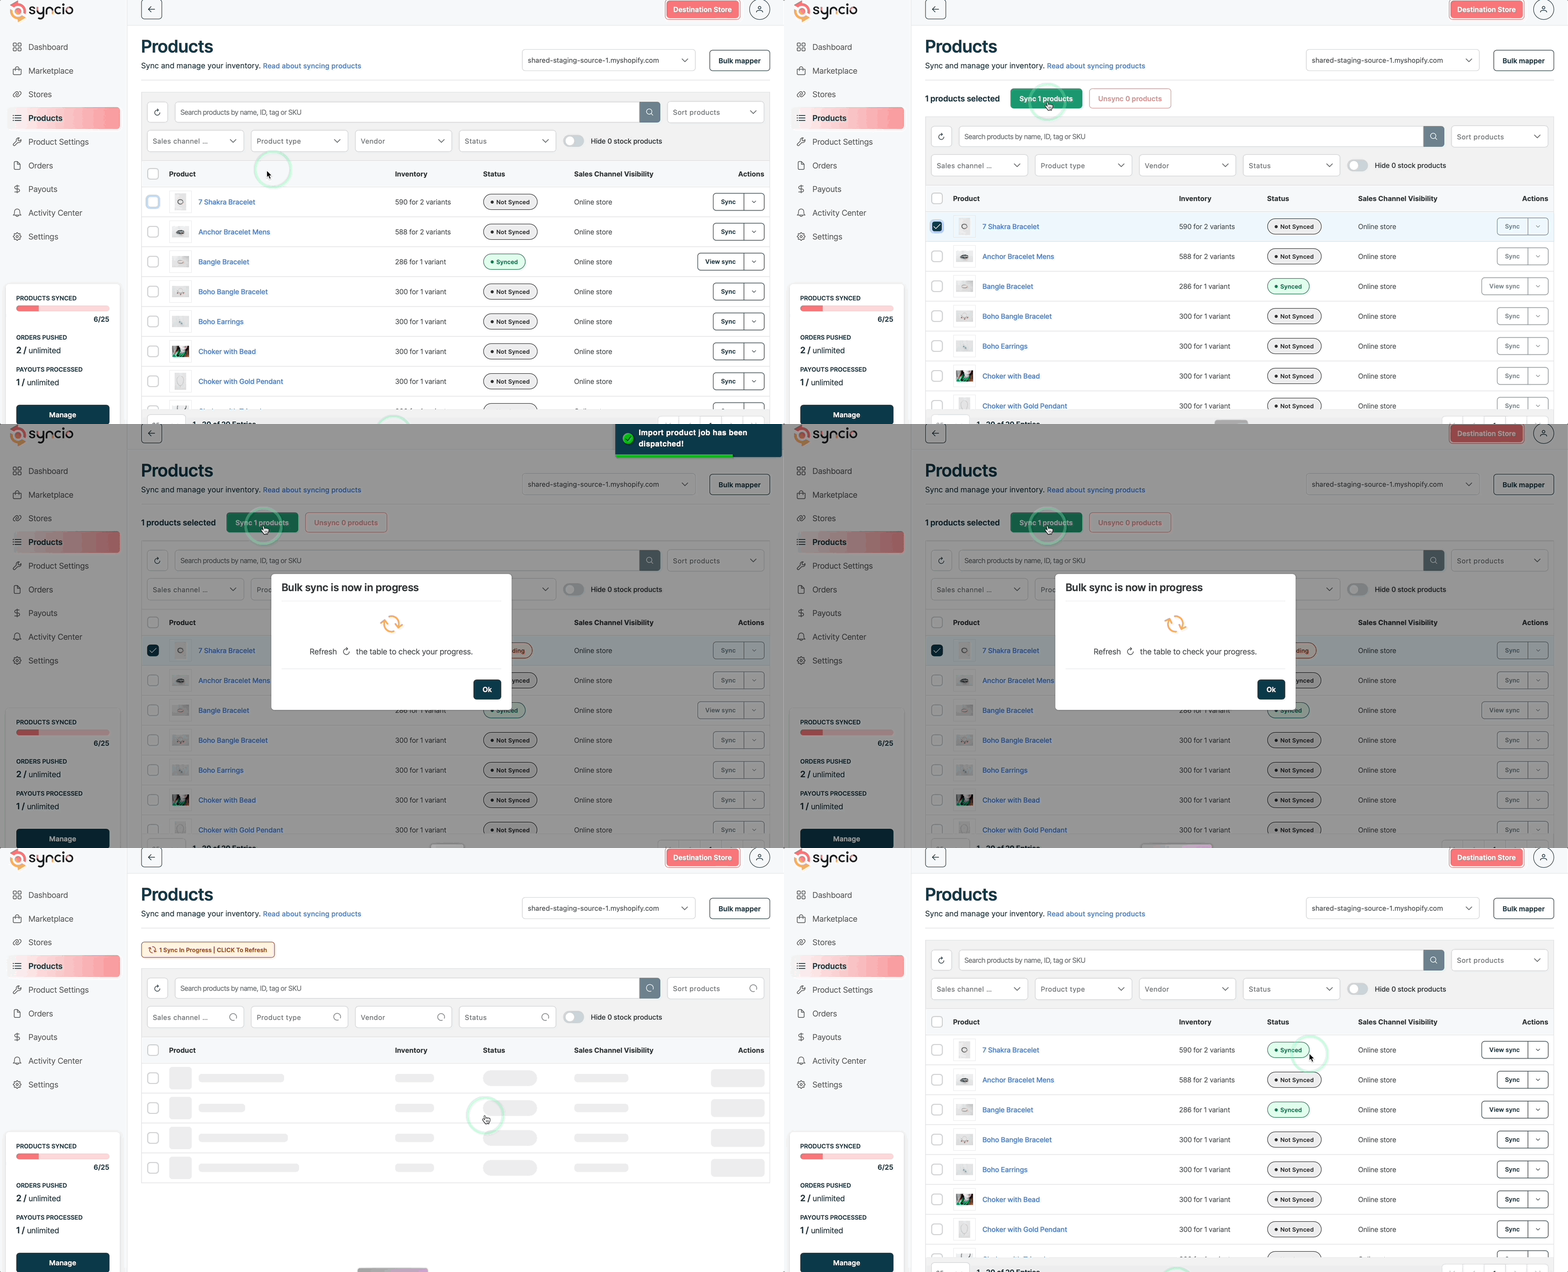
1. Select the checkbox next to the products(s) you want to import.
2. Click the "Sync" button on top.

And you’re done! Your products have safely made the journey from Shopify to WooCommerce in one piece. The product titles, descriptions, images, variants, prices etc. for each product will automatically be transferred to your WooCommerce store. Here’s a handy breakdown of every product attribute that’s copied over during the import process with Syncio.
Once the products have been transferred across to your WooCommerce store, you can change and customize them as you please.
Manage ongoing inventory sync
One of the beauties of using Syncio is that it's not just a one-time import tool. The inventory levels for your newly-imported products will automatically be kept in real-time sync between your Shopify and WooCommerce stores. This is ideal if you’re planning on keeping both stores active.
Syncio creates two-way inventory sync via SKUs, which means that stock updates from either store update the other. So if a sale is made on your Shopify store, your inventory will automatically be updated on your WooCommerce store too (and vice versa).
If you’re permanently migrating from Shopify to WooCommerce, you can choose to turn off this sync. You can do this by using the “Unsync” function in the ‘Products’ tab. It works similarly to the “Sync” button; you can choose to unsync individual or bulk products.
Important: If you’re choosing to unsync, make sure to select the ‘Unsync and KEEP’ option. This will effectively breaks the inventory sync between a product from Shopify to WooCommerce. However that 'synced' copy of the product that we just imported will remain on your WooCommerce store, but will just not receive any sync updates.
Wrapping Up
Importing products from Shopify to WooCommerce doesn't have to be a hair-pulling, keyboard-smashing ordeal. With Syncio, you can seamlessly transfer your inventory and keep both platforms in harmony. Let’s recap the steps:
- Prepare your WooCommerce store for the import
- Install Syncio on both stores
- Connect your Shopify and WooCommerce stores using Syncio
- Import products with one click of the ‘Sync’ button!
Now go forth and conquer the e-commerce world, you multi-platform maverick! Your products are ready for their WooCommerce debut, and you're ready to watch those sales roll in.

.jpg)

