
Option 1: Transfer products using a Shopify app
Using a Shopify app is an efficient, reliable, and no-nonsense way to transfer products from one Shopify store to another, especially if you're working with a large number of products.
Using an app helps ensure that all your product details are accurately transferred over, without any loss of data. Plus, it's significantly faster than a manual transfer, saving you precious time and resources.
Of course, we're biased towards Syncio — but for good reason. Using Syncio, you can transfer products across Shopify stores with just 1-click.
This option is ideal for:
- Multi-stores: Using an app is ideal if you're transferring products between more than two stores, as you won't have to set up an individual transfer process for each store. With Syncio, you can transfer products across an unlimited number of stores in minutes.
- Syncing inventory & products: Unlike manual transfers, Shopify apps can automate inventory and product updates for your transferred products on an ongoing basis. For example, Syncio real-time syncs inventory and products across all your Shopify stores. This means that when stock levels or attributes are updated on one store, the inventory and product listings will automatically update on all other stores.
- Ultra-secure transfers: Manual transfers can leave your business vulnerable to the risks of human error, leading to inconsistent information across your stores. By automating the process, you can ensure that all your product data is accurately transferred across stores.
How to transfer products in 1-click with Syncio
Syncio is free to install and comes with a 14-day free trial, so you complete this entire process for free.
Step 1: Install Syncio on the store you want to transfer products from
First, you need to install Syncio on the store where the products currently reside. We'll refer to this as the "Source Store".
1. Log into Shopify Admin for your Source Store.
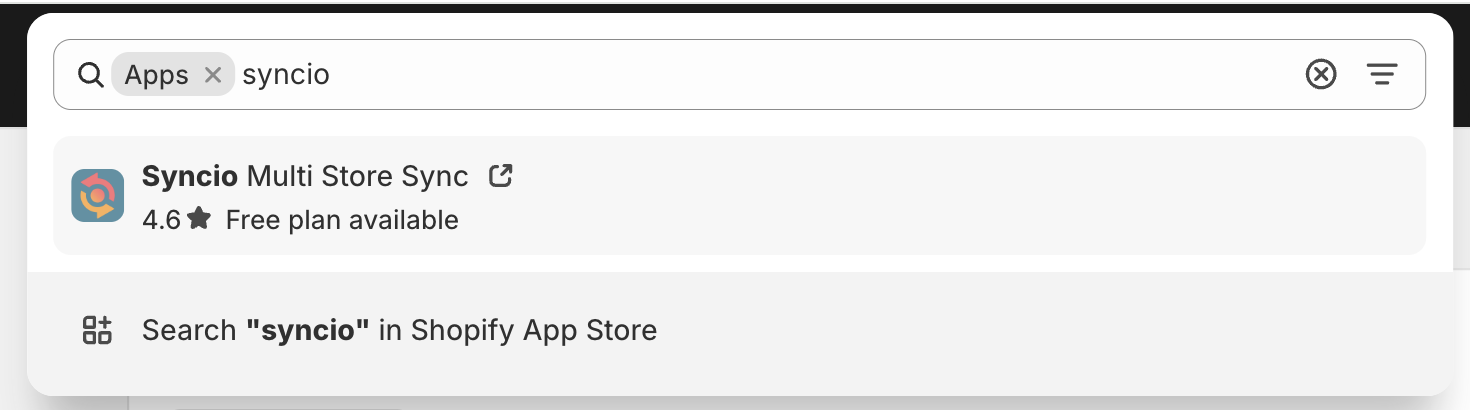
2. Search for "Syncio" in the search bar on top and click on "Syncio Multi Store Sync" to open the app in the Shopify App Store.
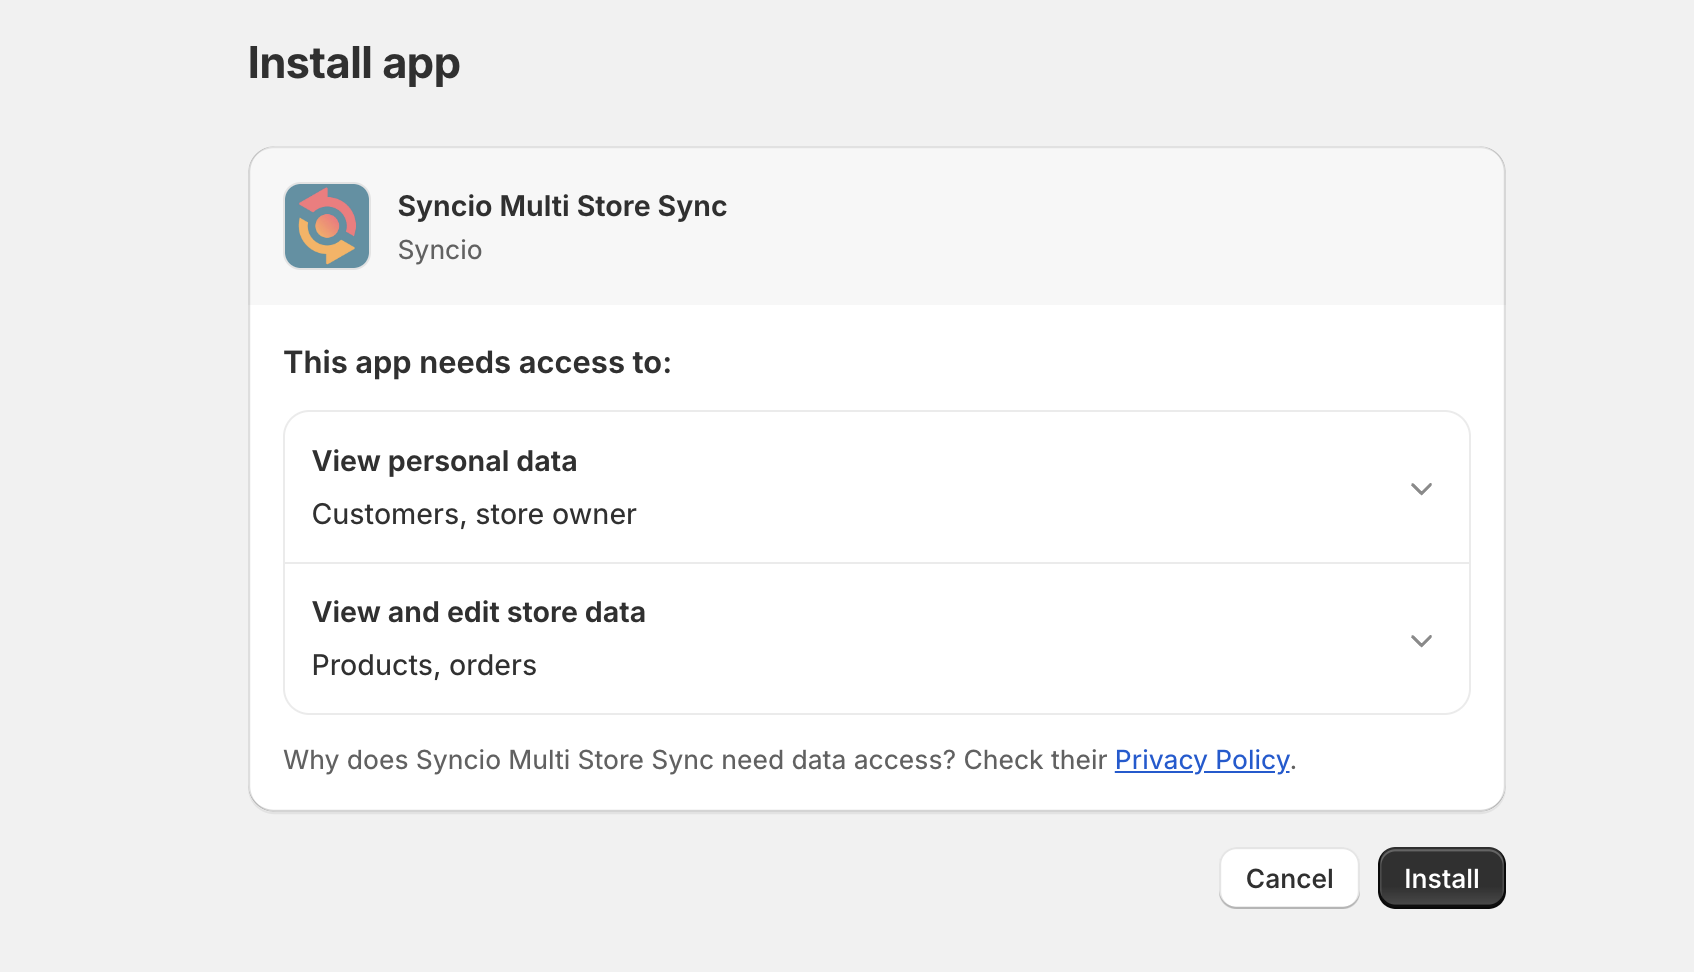
3. Click on the "Install" button.
4. Then complete the app permissions page by clicking "Install".
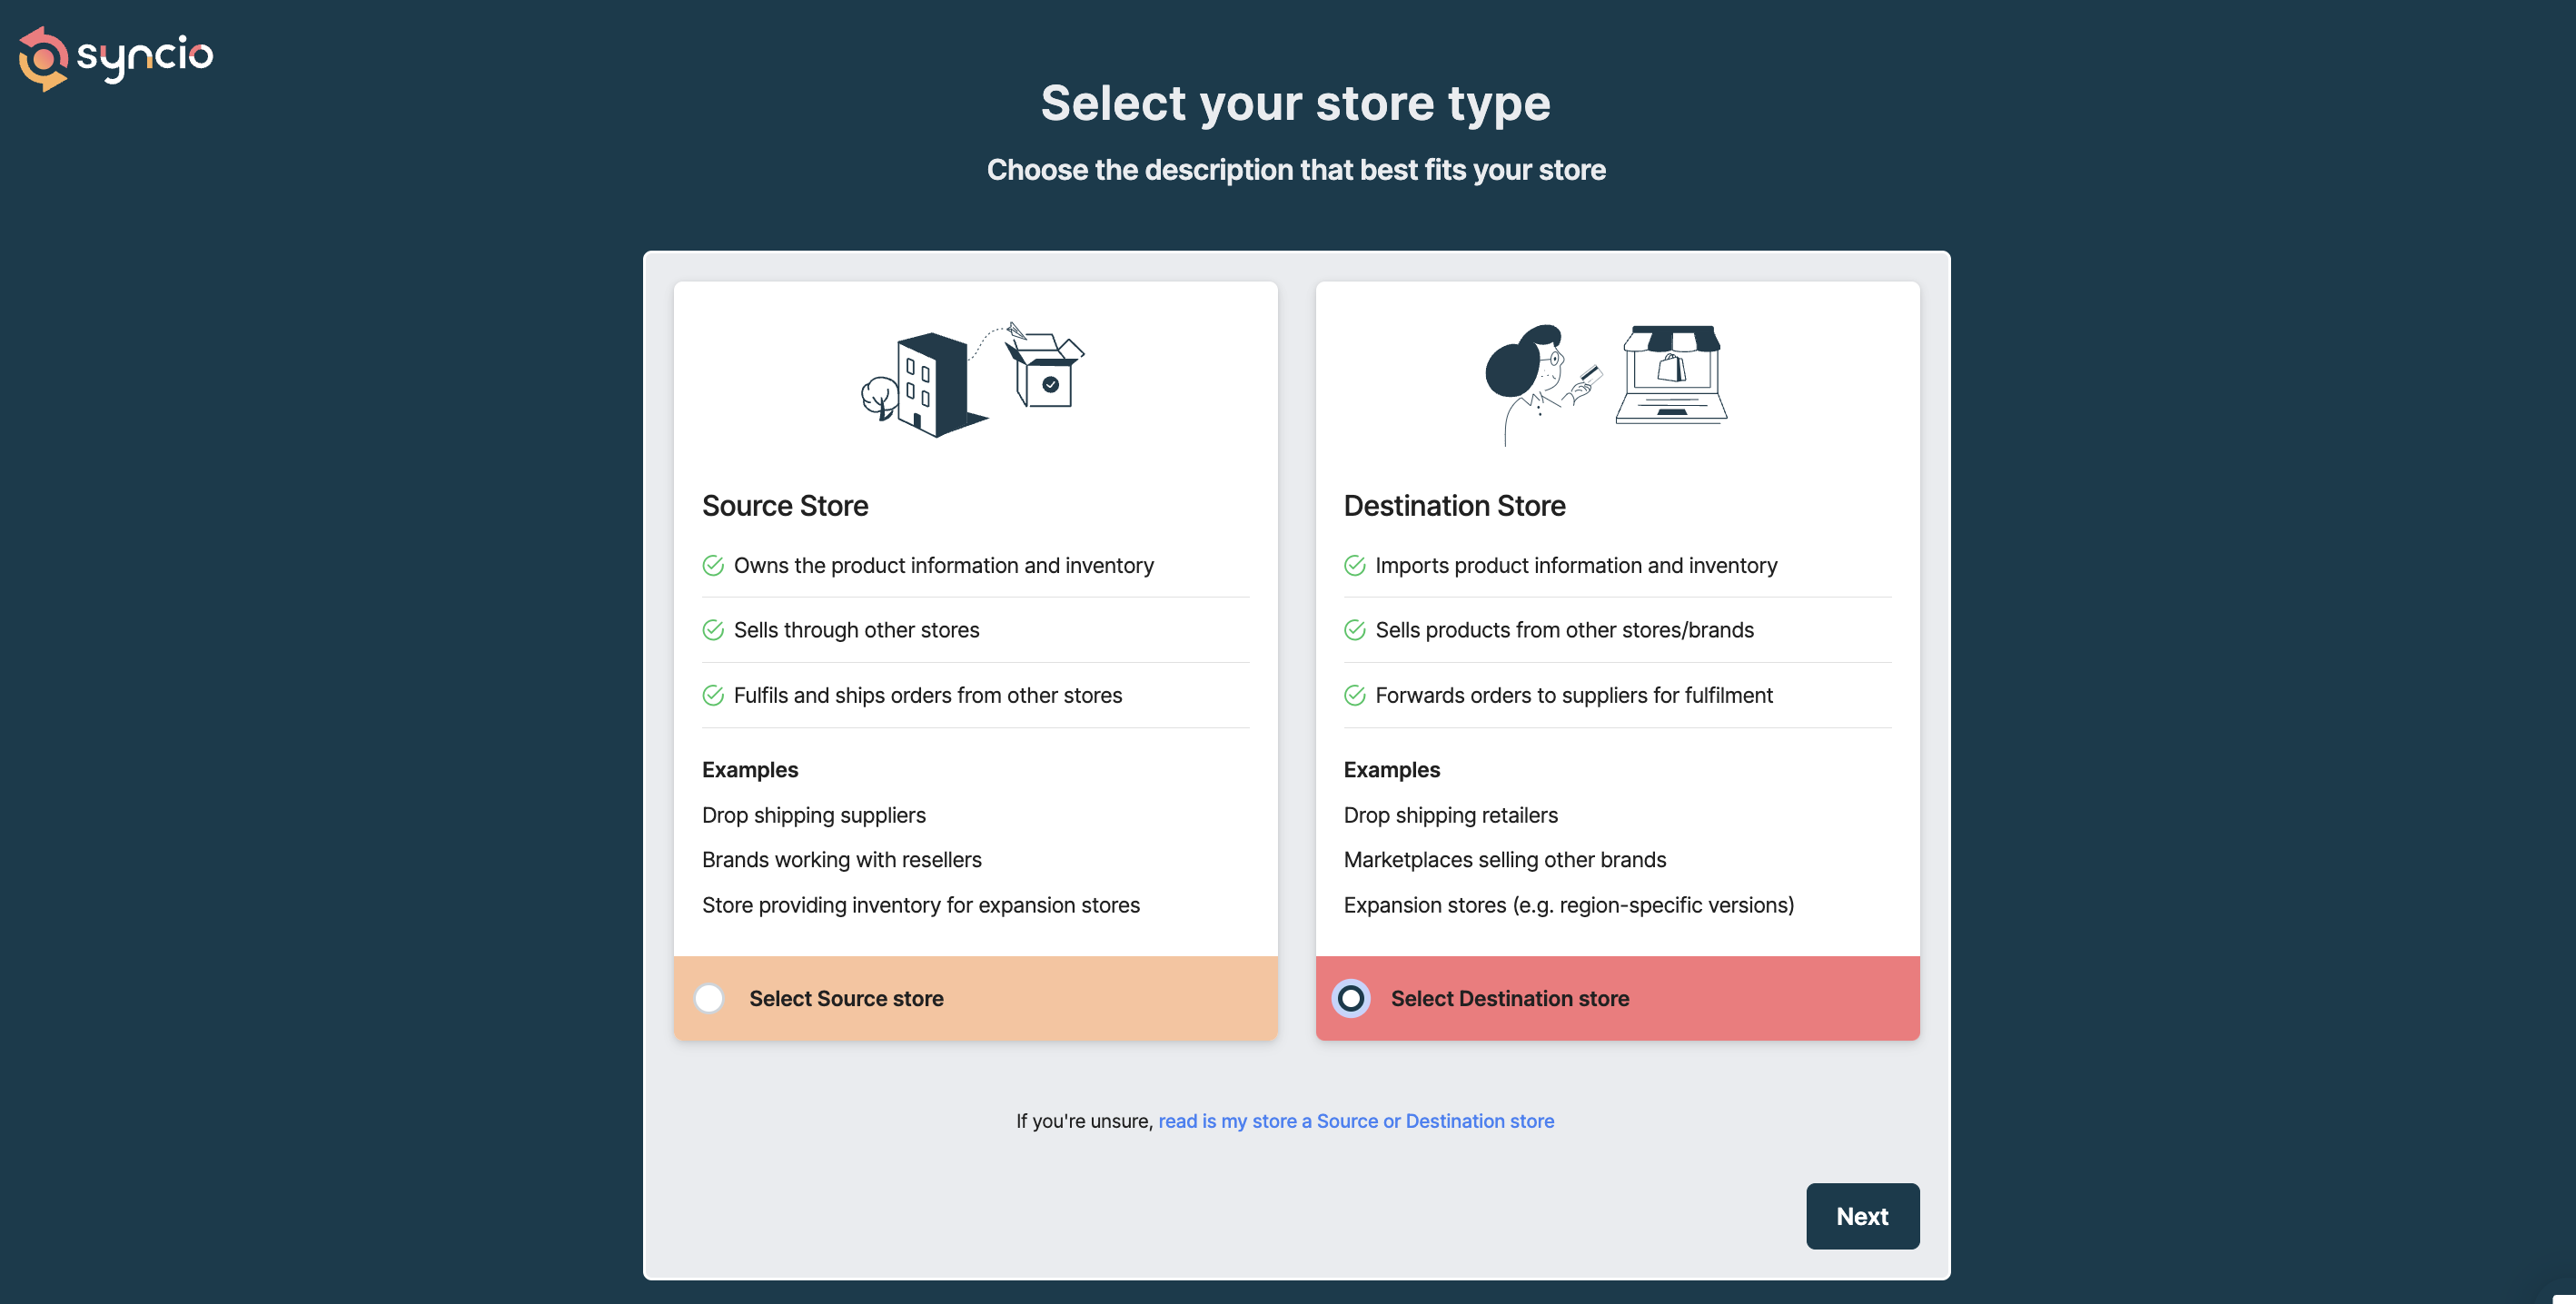
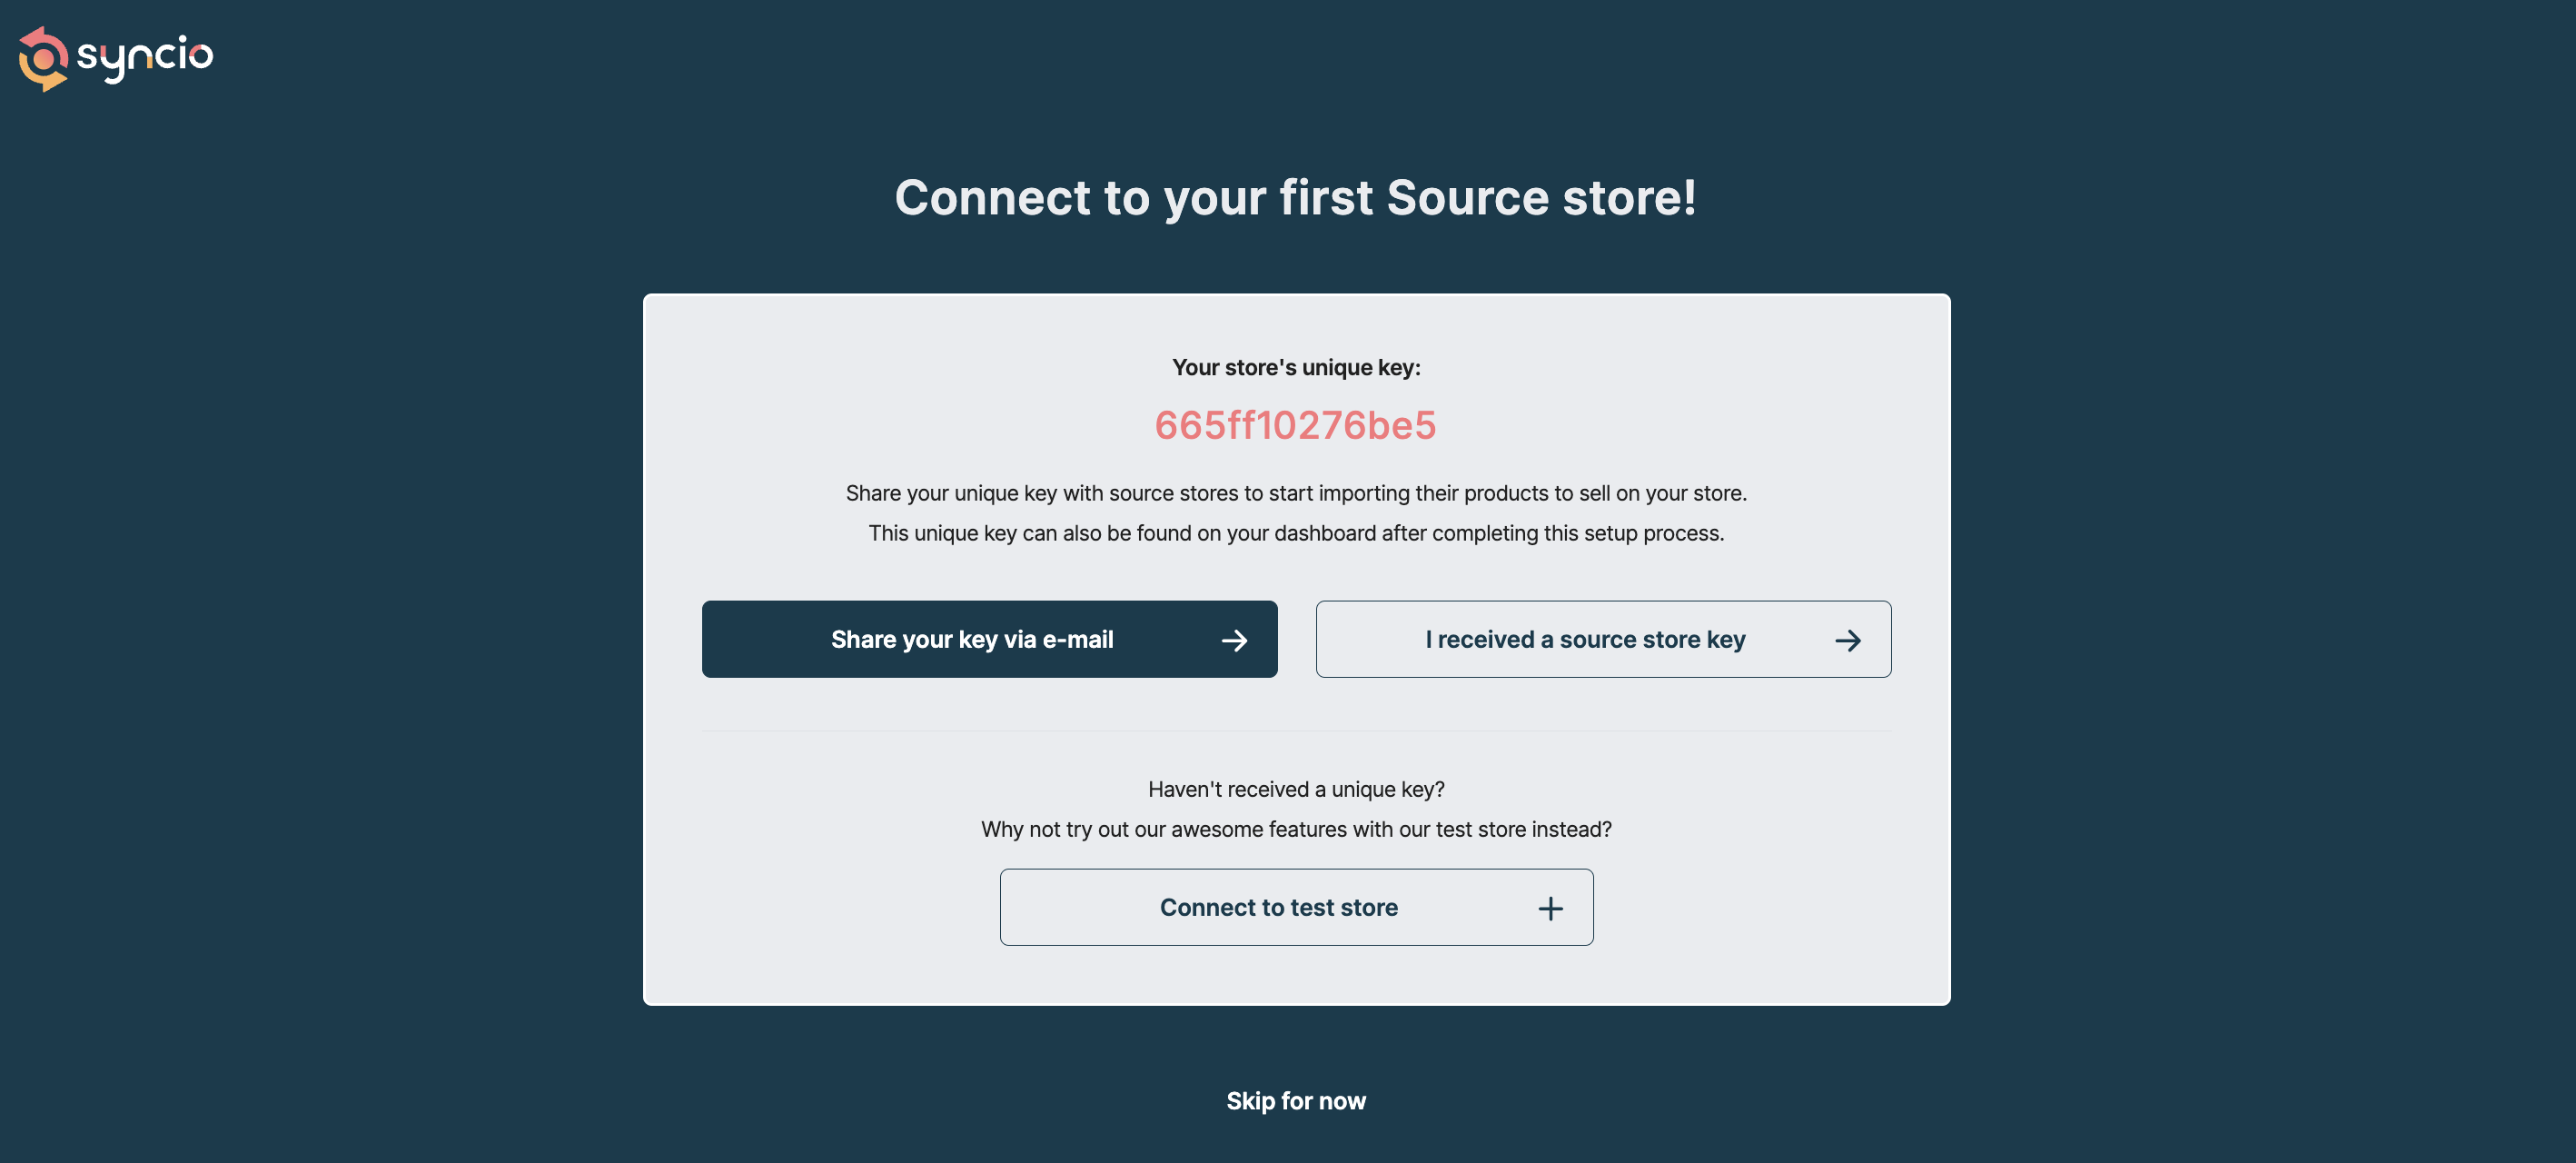
5. You'll then be directed to this screen. Select "Source Store" and click "Next".

6. Once you reach this page, copy your store's Unique Key. We'll use this key at a later stage, so paste it somewhere you can access it easily.
- Don't stress if you lose the key! You can access it at any time on your Syncio Dashboard.
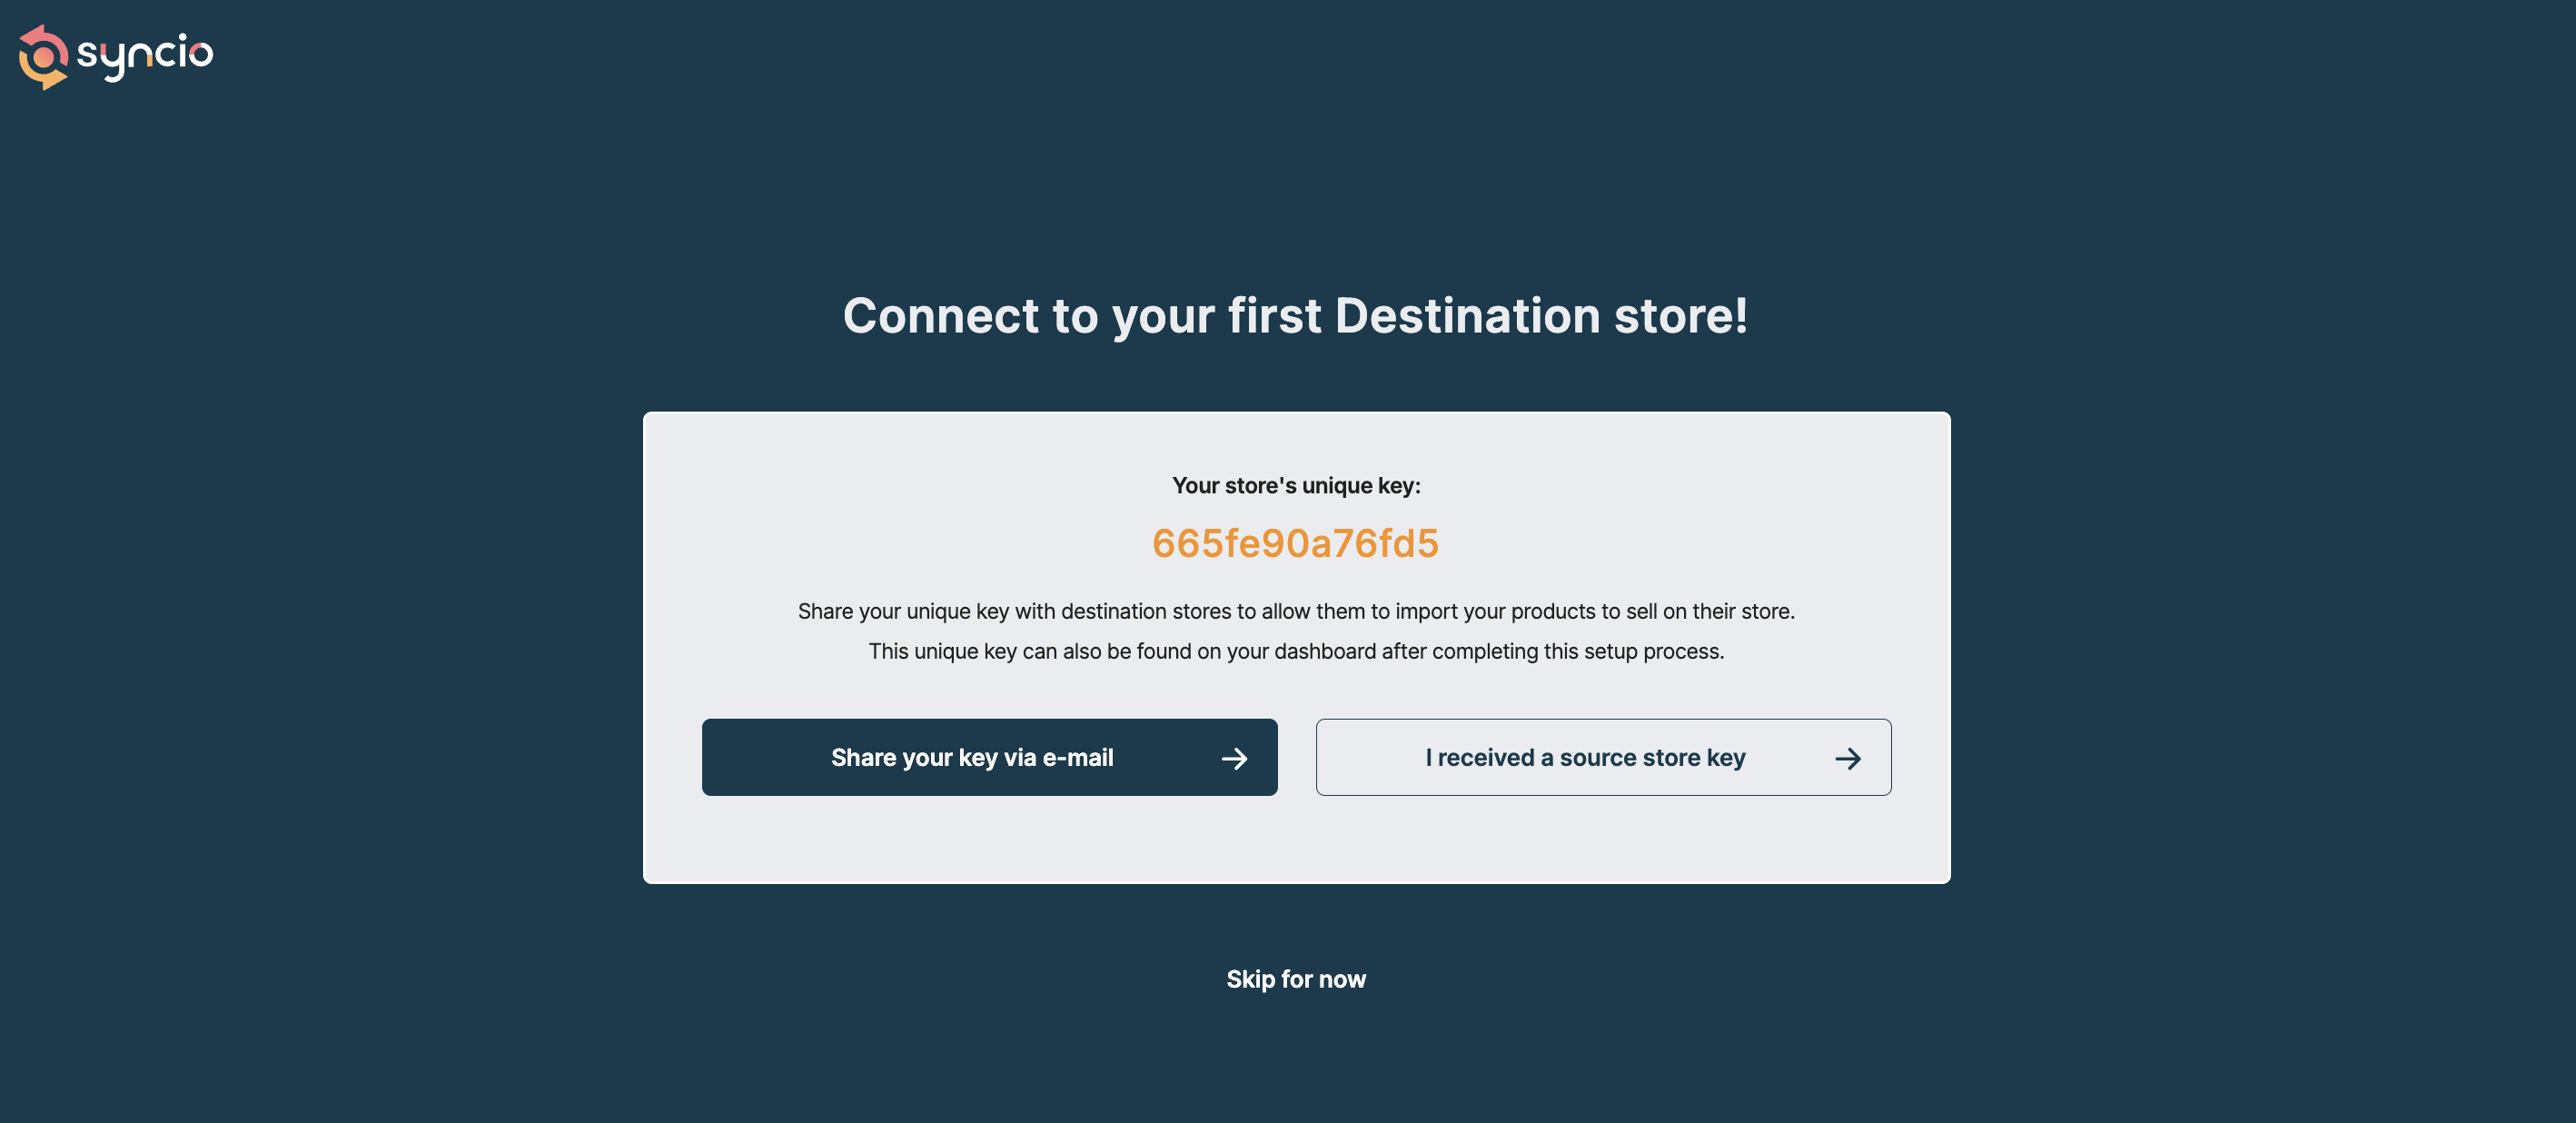
7. After copying your Unique Key, select "Skip for now".
8. Click on "Continue to dashboard". Your Source Store is all set up and ready for the transfer!
Step 2: Install Syncio on the store you want to transfer products to
Next, you need to install Syncio on the store where you want to transfer the products. We'll refer to this as the "Destination Store".
1. Log into Shopify Admin for your Destination Store.
2. Repeat steps 2 - 4 from the previous section to install Syncio on your Destination Store.
3. When directed to this screen, select "Destination Store" and click "Next"
4. On the next screen, select "I received a source store key".
5. Paste the Unique Key you copied from your Source Store earlier. Then, click "Connect".

6. The two stores are now connected and ready for product transfer!
Step 3: Select products to transfer
Now that your stores are connected, you can choose which products you want to transfer from your Source Store to your Destination Store.
1. Enter the Syncio Dashboard for your Destination Store.
2. Click on the "Products" tab on the left-hand side menu.
3. Click on the "Select a Source store" dropdown and select the Source store you just connected.

At this stage, you can choose to either:
Transfer products in bulk
1. Use the checkbox function to select all products.
2. Bulk sync them by clicking the "Sync" button on top.
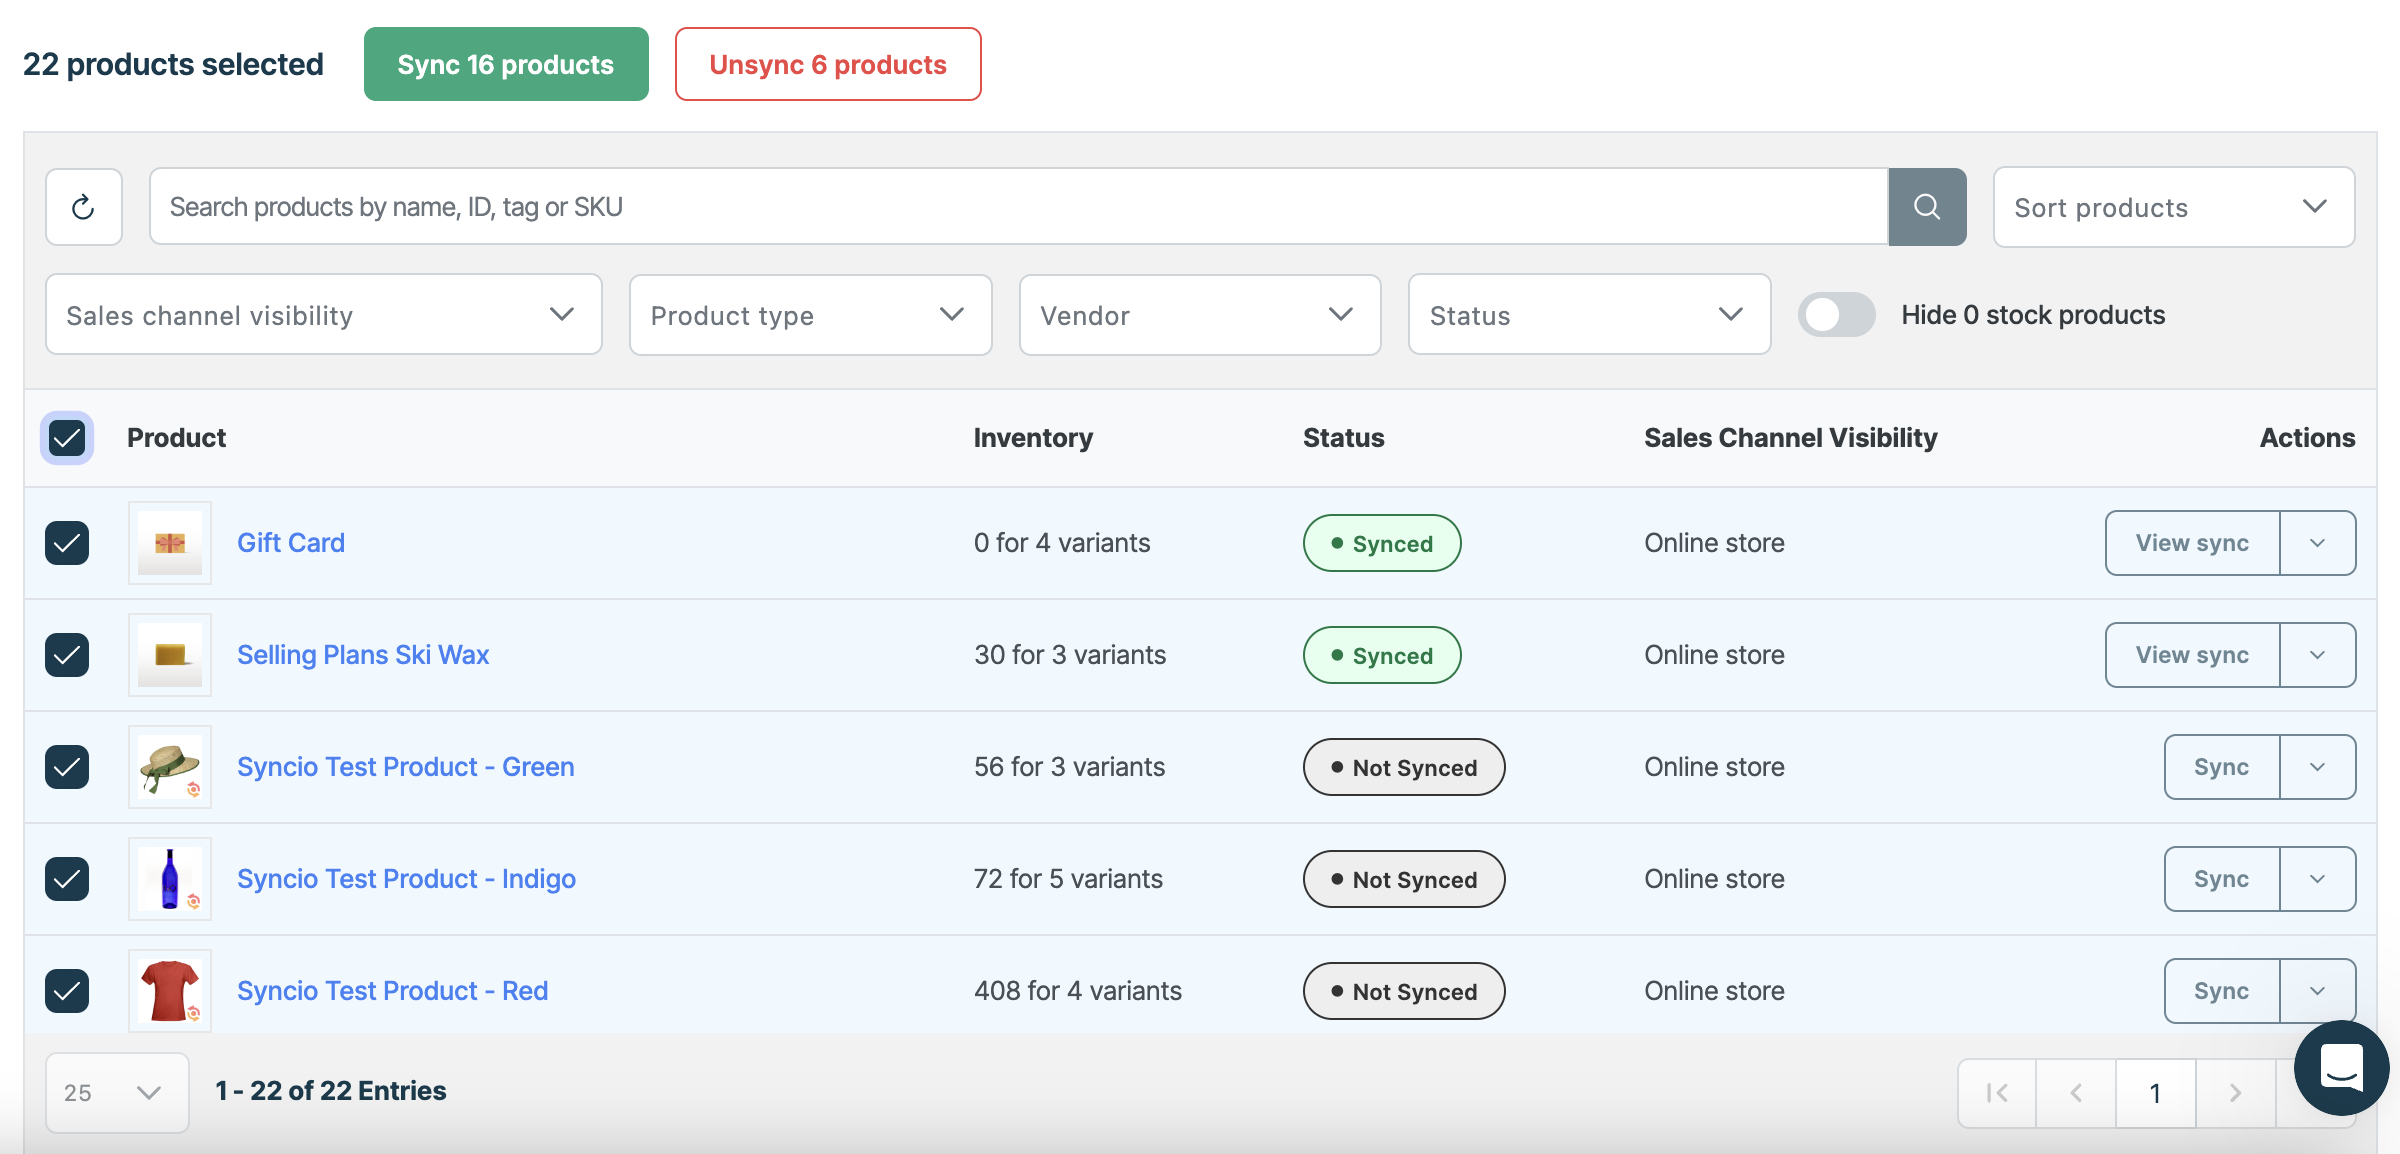
3. Alternatively, use the filters to bulk sync products based on attributes like name, tag, vendor etc.
Transfer single products
1, Select the checkbox next to the products(s) you want to sync.
2, Click the "Sync" button on top.
And your product transfer is complete! The synced products will automatically be transferred to your Destination Store, along with their attributes like product titles, descriptions, images, variants, and more.
Once the products have been transferred across, you can change/customize any product attribute you'd like.
Step 4: Configure ongoing inventory and product sync
Syncio will keep inventory in sync for your transferred products on an ongoing basis.
This means that stock levels for these products will automatically be adjusted on both the Source and Destination store when order and inventory updates are made.
If you want to sync product attributes:
With Syncio's optional Product Settings feature, you can also choose to sync product attributes in real-time between the two stores. This means that any future changes to the product in the Source store will automatically be carried over to the Destination store.
By doing this, you can save tons of time on manually adjusting and managing products across both stores. Read our comprehensive Product Settings setup guide to configure this function.
If you want to turn off inventory sync:
You can choose to turn off this sync by following these steps:
1. Select the products you want to unsync using the checkboxes.
2. Click the "Unsync" button on top
3. Choose "Unsync and Keep"

This will keep the transferred products on your Destination Store but break the ongoing inventory sync between the two stores.
Option 2: Transfer products manually
You can also choose to use Shopify's built-in import and export functionality to transfer products from one store to another. With this option, you can use a CSV file to carry product data between stores.
This is a straightforward option if you're doing a one-off transfer for a small number of products or if you're not in a huge rush. However, it can become tedious and time-consuming if you're transferring a significant number of products or need to keep products in sync between stores.
This option is ideal for:
- Smaller transfers: If you're only transferring a handful of products, this option is quite straightforward. The CSV functionality can be simple for managing a small number of products at a time. However, it can get quite tedious if you're transferring a large number of products, as you'll have to manually audit and update each product, variant, and handle to ensure accuracy.
- One-off transfers: A manual transfer is also suitable if you're doing a one-off migration from one Shopify store to another, and are planning on retiring the source store after migration. If you don't need ongoing inventory sync between the two stores, then Shopify's import and export feature should meet your needs.
- Easy customization: You can manually customize any product attribute in the CSV file prior during the product import process, giving you complete control over the products before they're transferred to your destination store.
How to transfer products with Shopify import/export
Follow these steps to set up a manual product transfer. You'll only need your two Shopify stores for this method, no additional tools or apps needed.
Step 1: Export products from the source store
1. Access the Shopify admin panel for your source store (ie. the store where the products currently reside).
2. Navigate to the Products tab.
3. Find the Export option under Products and click on it to initiate the export process.
4. In the dialogue box, carefully choose the products you wish to export. You may select either all products or specific ones.
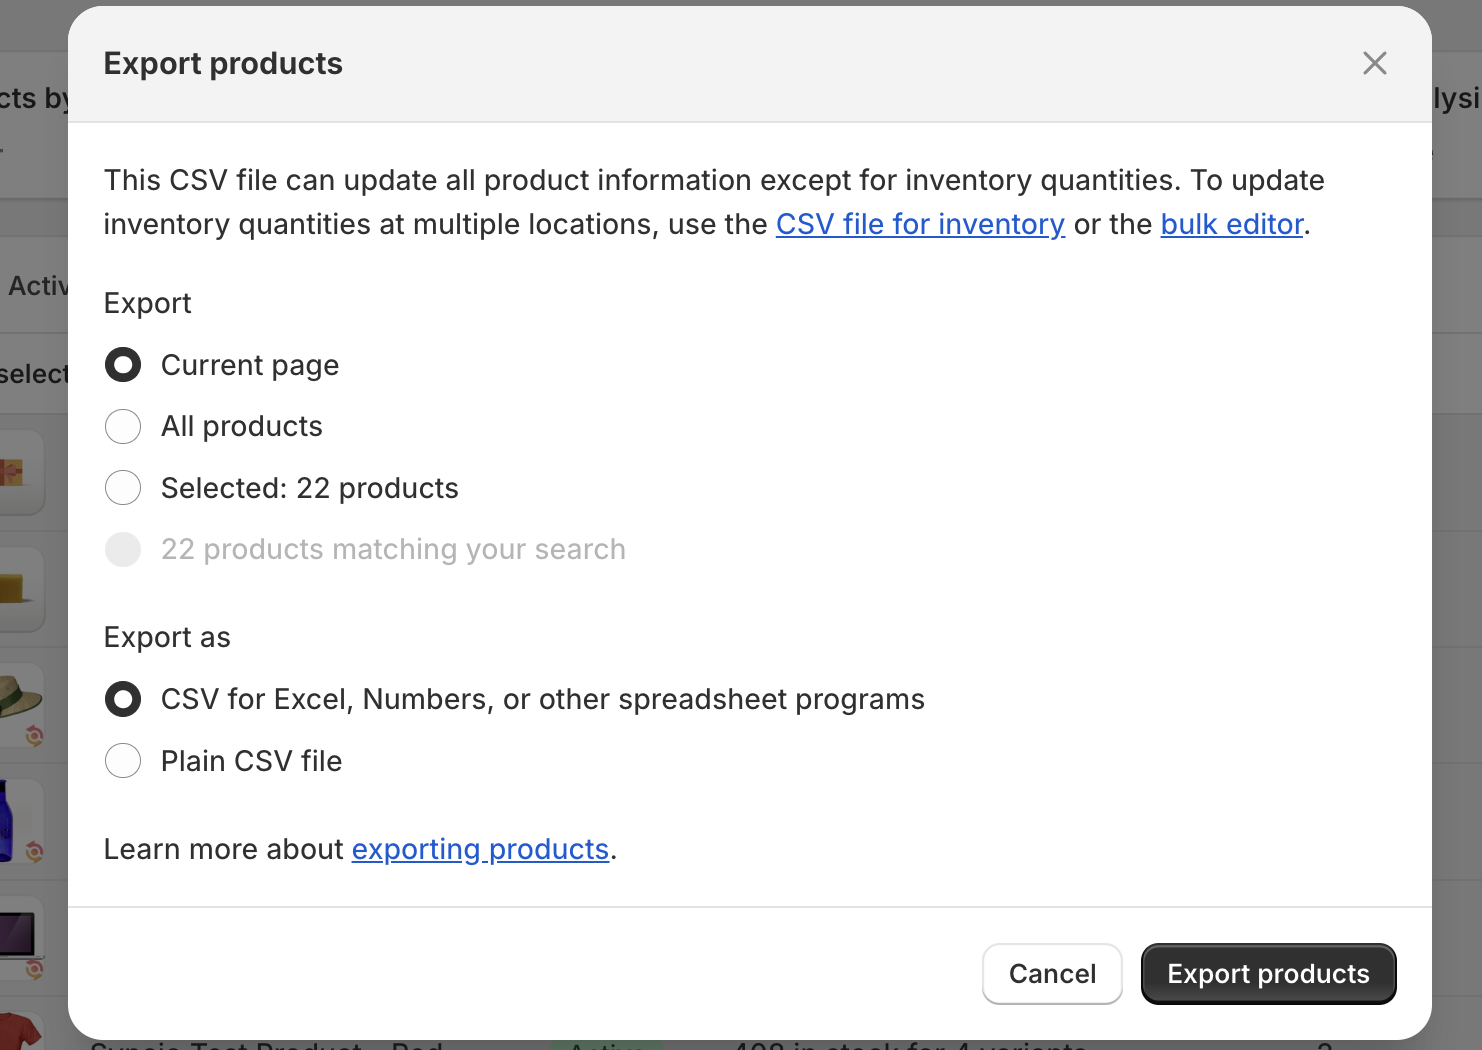
5. Select "Export Type":
- Advanced File: Ideal for working with your CSV file in applications like Google Sheets or Excel.
- Simple CSV File: Suitable for working with plain-text editors.
6. Review your export settings and click the "Export products" button to generate the CSV file.
Step 2: Prepare your CSV file for import
Once you’ve exported your products from the source store, you’ll want to give extra attention to that CSV before importing it into the destination store. This step is crucial for a smooth and accurate transfer.
1. Review and modify the CSV file's column headers to match the product fields of the destination store.
2. Ensure the exported data is accurate by corroborating it with data on your source store.
3. At this stage, you can choose to (carefully) make manual adjustments to product attributes in the spreadsheet prior to the transfer.
Step 3: Import products to your second store
1. Log in to your Shopify admin panel for the destination store (ie. the store you want to transfer products to).
2. Navigate to the "Products" tab in the admin interface.
3. Under "Products," locate and click on the "Import" option to begin the import process.
4. Locate and attach your prepared CSV file. You'll be asked to choose between the following options:
- Overwrite any current products with the same handle: If you pick this, any matching handles in your import CSV file will replace the existing ones in your product list. If you skip it, products with matching handles will be left untouched during the import.
- Publish new products to all sales channels: Select this to publish new products across all your sales channels, not just your online store.

5. Preview your first product and triple check to ensure that the data aligns correctly.
6. Click “Import” to start the transfer. Shopify will process the CSV file and import the product information into your destination store.
And you're done! The time it takes to complete the import can vary—it depends on the size of the file and how many products you're moving around. Larger files and more products might take a bit longer.
Start transferring your products for free
Ready to get started? Syncio is the way to go if you're keen to transfer your products quickly and reliably.
Install Syncio on the Shopify App Store. As we mentioned, Syncio comes with a 14-day free trial so you can get started for free! For Shopify inventory sync and product updates, Syncio has plans starting from $0.
.avif)